First of all, if you’re not familiar with Notion, it’s a customisable and easy to use productivity app. Head over to https://www.notion.so/product to learn more.
If you want to create invoices in Notion fast, you can skip the instructions below and purchase my template: https://notiondad.gumroad.com/l/invoice
Why Notion?
Why would you even want to use Notion as your invoice generator? It may not have the advanced accounts payable automation of other platforms but there are many reasons to do your invoicing in Notion.
The number 1 reason for me is the personal ecosystem that you can build in there. Imagine you have your CRM linked to your invoices, that are linked to your client projects, that are linked to your personal wiki, that’s linked to… you get the picture!
Start Building your Invoice Generator
Let’s have a look at how to use Notion to create invoices.
The first thing we need is a new database. We have a lot of different options for views in Notion but we’re going to go with the simple Table View. It’s the easiest to start with and gives us everything we need.
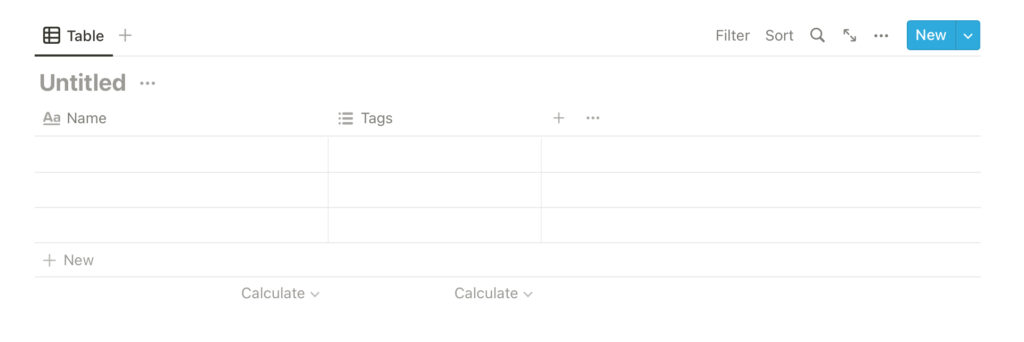
When you make a new database, you start with a Name column and a Tags column. Let’s delete the tags column and start adding our own. Notion has a lot of different properties. Each property is a new column in our database. These are all the columns we’re going to add to make this invoice generator work.
- Progress: Status property with 3 statuses: Not sent. Invoice sent. Paid. We’ll use these to track the status of our invoice and make sure we get paid.
- Invoice ID: Formula property to create an automatic invoice ID. This is the formula we’re going to add.
if(empty(prop("Date of Issue")), formatDate(now(), "YYYYMMDD"), concat(formatDate(prop("Date of Issue"), "YYYYMMDD"), "-", slice(replaceAll(id(), "[^0-9]", ""), 0, 7))) - Three date properties: Date of Issue. Due. Date Payment Received. We’ll use these to know if payments from clients are late.
- Amount: A number property. This is the amount the invoice is for. You can adjust this to include a currency too if you like.
- Late Payment: A formula property to tell you how late the client is with their payment.
if(now() > prop("Due"), if(prop("Progress") != "Paid", "Overdue by " + format(dateBetween(now(), prop("Due"), "days")) + " days", ""), "")
I have built all this and more into a ready-to-go Notion template. If you’re interested in purchasing it, you can find it all here: https://notiondad.gumroad.com/l/invoice
Designing The Invoice
Now that we’ve got all the technical stuff out the way, we want to design the invoice that we’ll be sending to clients.
If we click the dropdown arrow next to the new button, we can start designing a template. We’ll use this template for every new invoice so that we only have to enter a few details.
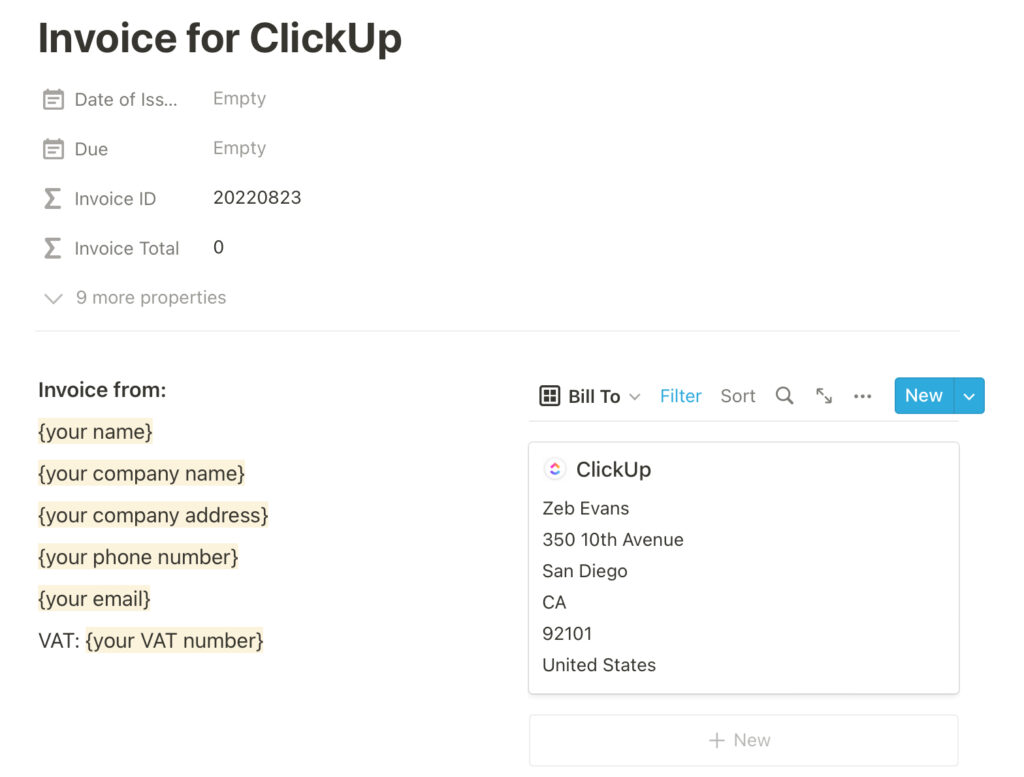
With the new template open, we can show and hide specific properties from the database. The ones I want the client to see are:
- Date of Issue
- Due
- Invoice ID
- Amount
Next we want to add the details that we’ll be using for every invoice. Slash commands are your friend in Notion. Type / and then start writing the word column. We want to create 2 columns for our layout.
💡 Note; this is all general preference. Feel free to generate your invoice layout howyou like.
On the left side, we want our details. On the right, we want the client’s details. The screenshot below is from the invoice template with the built-in CRM. The client details are entered automatically.
Below all the details, we want to add a breakdown of costs. This can be done in two ways. One is to use a simple table. A simple table in Notion is a table layout that’s not a full database. This can actually look neater if you’re only invoicing for 1 or 2 items.
The other way is to create an invoice breakdown database inside your table. The advantage to this method is it will sum up your invoice automatically for you.

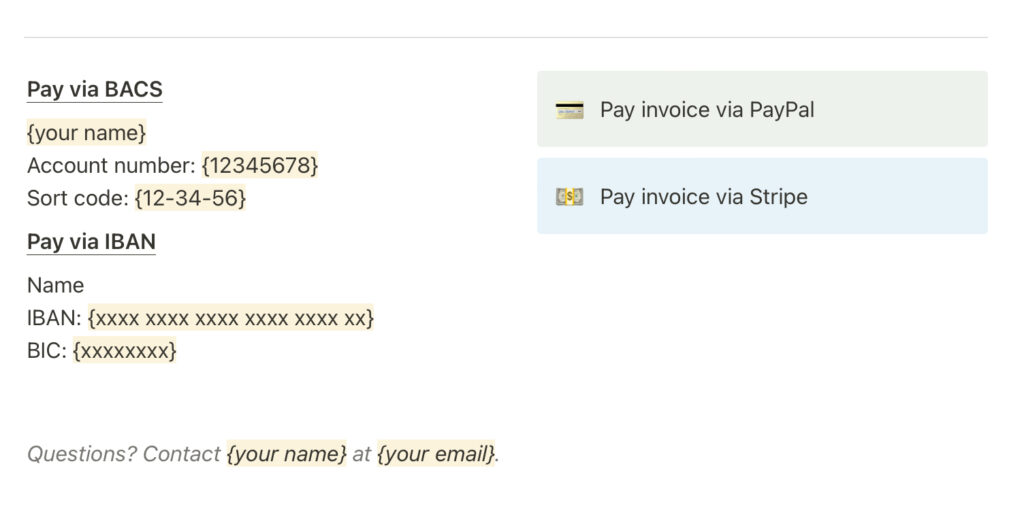
Finally, we want the client to actually pay us so adding our payment details is a good idea. Again we’re using a 2-column layout with your payment details on the left and some payment buttons on the right.
These ”buttons” are callout blocks in Notion. You can highlight the text and create a link to your PayPal or Stripe payments to turn them into buttons. The more options you give them, the higher the chance of a paid invoice!
Finishing Up
Now we have a beautiful looking invoice, we need to be able to send it to clients. Emailing a PDF is still my preferred way of doing it.
Notion’s PDF export function still leaves a lot to be desired. The best way I’ve found to create a good PDF export is to open the page in full screen mode. Then use your browser’s print to PDF function.
Once it’s sent to the client, you can track the progress using the status property on the invoice.
Buy The Template
Using the instructions, you can build yourself an invoicing template in Notion. Or you can save yourself a ton of time and buy my Notion Invoice template. It has more features such as:
- Late payments automatically highlighted for your attention
- Ability to track multiple currencies
- VAT built into the invoicing
- A built-in CRM to connect your invoices with your clients
- Calendar view to see payments that are due
- 20 minutes of video guiding you through the template.